What is the Nightscout project?
Nightscout (CGM in the Cloud) is an open source, DIY project that allows real time access to a CGM data via personal website, smartwatch viewers, or apps and widgets available for smartphones.
Nightscout was developed by parents of children with Type 1 Diabetes and has continued to be developed, maintained, and supported by volunteers. When first implemented, Nightscout was a solution specifically for remote monitoring of Dexcom G4 CGM data. Today, there are Nightscout solutions available for many of the CGM devices on the global market. Nightscout also provides browser-based visualization for #openAPS users and Loop users. The goal of the project is to allow remote monitoring of a T1D’s glucose level using existing monitoring devices.
How Do You Get Your CGM in the Cloud
The best setup guide is currently found at https://nightscout.github.io/
That guide is maintained by the community and includes information on setting up, using NS with looping, and maintenance options. It should be your primary source of technical instruction.
How Does It Work?—(Original Nightscout)
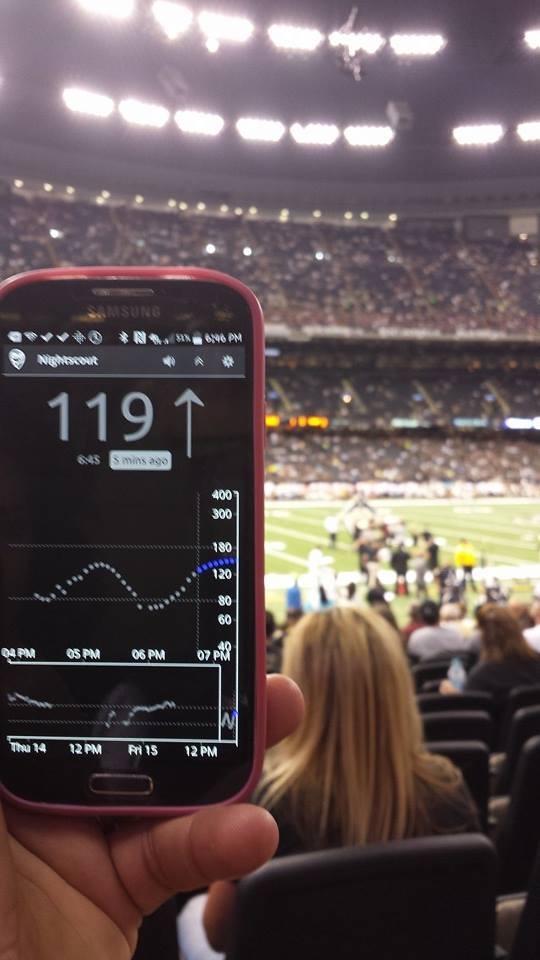
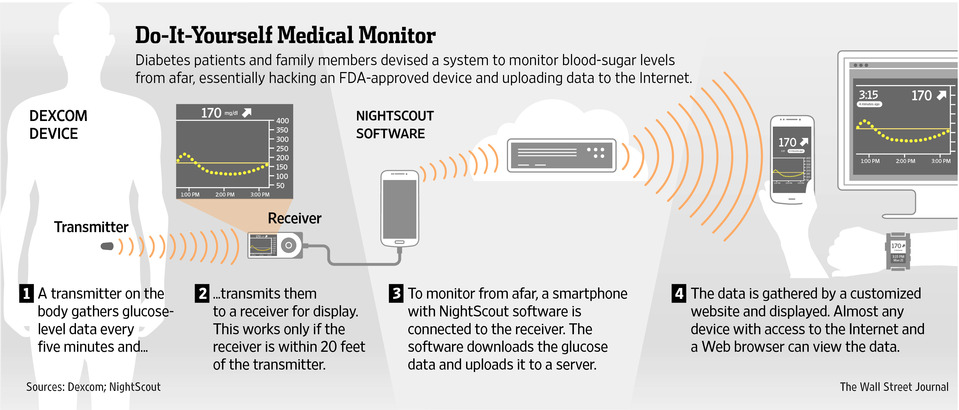
The technology is rather simple: your Dexcom receiver continues to work as it always has by reading the glucose level of the T1D who is wearing the sensor/transmitter. The Nightscout system allows you to attach (or pair) a device to the Dexcom receiver that transmits the glucose readings to the Internet, where any web-connected device can view the numbers. It’s that simple.
This image from the Wall Street Journal article, “Citizen Hackers Tinker with Medical Devices,” illustrates the entire system. (Click the image for a larger view.)
What Does It Cost?
Cost varies based on the setup you will be using. The online services and accounts needed to run a Nightscout site are free for most users.
What Do I Do Now?
The sole purpose of your specific website is to display the data. Due to the caveats mentioned and for many other reasons, it is important to not rely on this for therapy .
Reading through the step by step instructions for your particular setup before you start will help prepare you for putting everything together and learning how to use the system.
Please note: Many of the resources and documents on this site describe the original Nightscout setup (which involves a cable and an Android). There are wireless solutions now available. Documentation is being added and revised on an ongoing basis.
All we ask is that you pay it forward because #wearenotwaiting.


Join the CGM in the Cloud Community at Facebook!
Are you looking for technical support for your existing Nightscout installation or do you have questions about your existing Nightscout installation? Please visit the CGM in the Cloud group on Facebook for help!
Note: There is no support or any warranty of any kind. The quality and performance of the project is with you if you choose to use it. This is a project that was created and is supported completely by volunteers.
DISCLAIMER